Create your own picture control using Nikon ViewNX
The software should come with the camera, if you lost the CD, you can also download ViewNX for free from Nikon's website.
After installation, run ViewNX and click on 'Quick Adjustment' tab on the left bottom of the program.
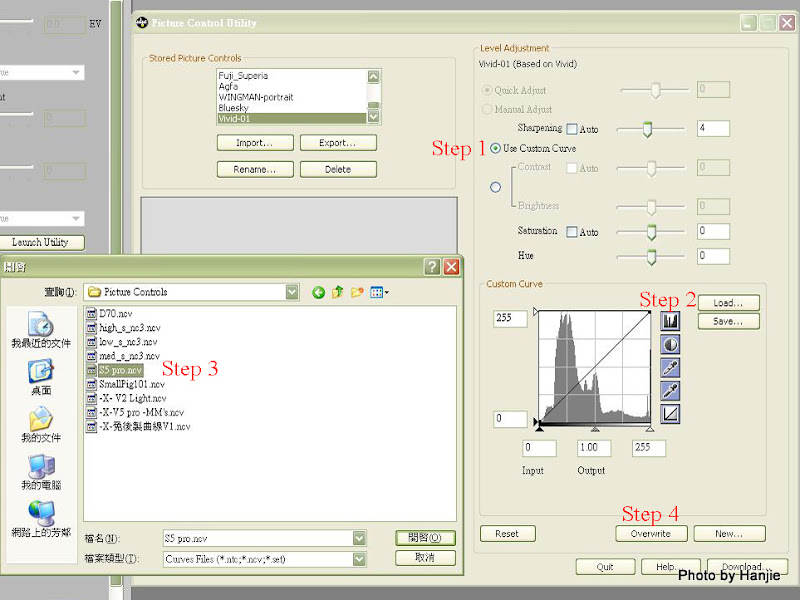
Step 1: Click on Launch Utility to activate the Picture Control Utility
Step 2: Select a stored Picture Control. Select a predefined picture control as a template for your modification; vivid is a good start if you like a highly saturated photo.
Step 3: Click on 'New' button on the right
Step 4: Rename your Picture Control then press OK button. You can find a new picture control is created in the Stored Picture Controls list.

To modify the Picture Control to meet your need:
Step 1: You can adjust all parameters in 'Level Adjustment' the way you like; to adjust Curve, select 'Use Custom Curve' to enable the custom curve control.
Step 2 (optional): Load Custom Curves. You can also download custom curve files (*.ntc) from PC1, PC2, PC3, PC4.
Step 3 (optional): Select downloaded curve files
Step 4: Press 'Overwrite' button to save your modifications.
 Now you can edit photos with your own picture controls by selecting a specific picture control in 'Quick Adjustment' tab of the ViewNX.
Upload Picture Controls to Camera
Except for 6 default picture controls, there are 9 extra spaces in Nikon D90 that allow users to upload custom picture controls to the camera. To do that first plug in your SDHC card to PC via USB. Open the Picture Control Utility window and select the picture control you want to export as step 1. Step 2: Select a number then press 'OK'.
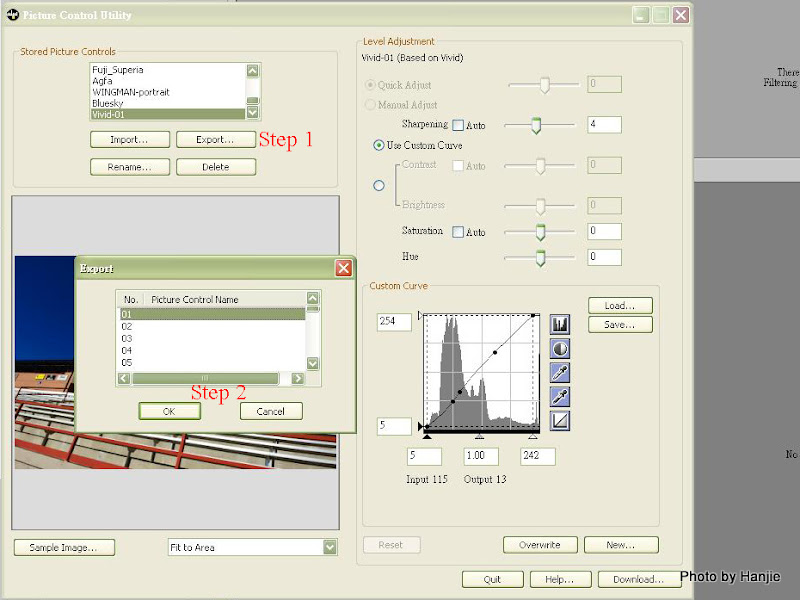 The program creates 2 folders in your SDHC card which are NIKON/CUSTOMPC and the custom picture control file is sent as PICCON01.NCP to the CUSTOMPC folder. The number of the NCP file is coresponding to the No. you select when exporting.
Plug in your SDHC card back to the camera and press the MENU button. Select SHOOTING MENU...


 To set Picture Control:
 The photos will be recorded as Vivid-01 style.
References:
http://www.wretch.cc/blog/c8631506
http://www.wretch.cc/blog/wingmanzero/9179577